
When you wrap a package, are you left with lots of little pieces that are just a bit too small to wrap another gift?

Instead of tossing them, tear them into strips. Don't cut with scissors because you want the unkept edges--that's the designer look. :) Different lengths are fine -- anything from about 6 inches to 18 inches. You will need more longer strips than shorter. The longer go on the bottom, the shorter on top. Tear yourself a nice big pile of them--at least 24 pieces for a big box.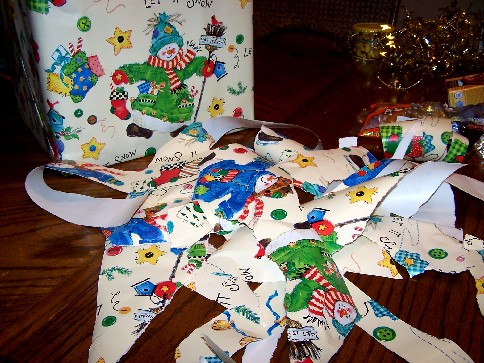
Take some ribbon and criss-cross it across the top of the package securing it well with tape on the inside of the lid. Take another long piece of ribbon (about 2 feet and put it underneath the center of the ribbon. Take a knot to keep it in place.
Take about 6 pieces of the longer wrapping paper strips and lay them across the package top somewhat centering them over the knot. Don't take extra time to make sure the strips are perfectly centered because it does not really matter.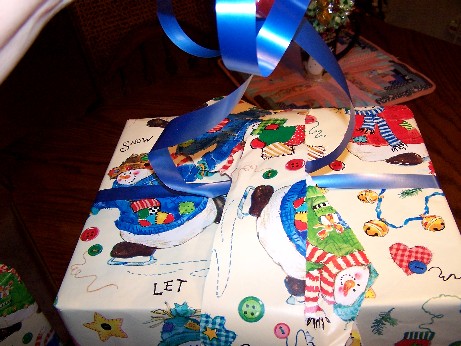
Tie the ribbon once, but not in a knot this time. Pull it tightly. This will cause the paper strips to lift up. That's a good thing.
Now take the edge of a pair of scissors and curl the paper just like you would curling ribbon. You will use your left hand to hold the bottom of the strip of paper (I had to use mine to take the picture). The paper will tear easily, perhaps causing a cuss word or two to escape your lovely lips. Don't stress over it. Just curl what's left, if it's long enough, otherwise leave it there and move on. I you rip every piece, then go ahead and start stressing, 'cause you won't have anything left to make the bow! :( Add another layer of strips and repeat all the above steps. You will need a minimum of 4 layers for a large bow. Just keep adding until you are happy with the size of the bow.
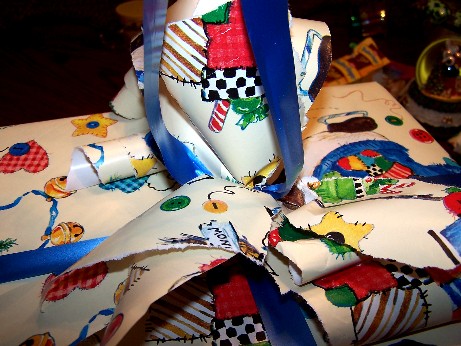
After my last layer I added a small handful of this paper shredding stuff for a little accent color. Just plop it in the middle and tie it the same as the other paper. I also cut another piece of blue ribbon and tied it in at the same time. Curl the ends of the blue ribbon.
Voila!
A custom bow for your package.
 I learned how to do this years ago from a lady who owned a gift shop. She made these boxes up and sold them in her gift shop. I have done MANY different things with this over the years. I've used leftover wallpaper for a very sturdy package, tied all sorts of little thing into the bow--toys for a child package, sticks and pinecones for the natural look, bridal tule, beads, etc. You're only limited by your imagination.
Notice how long this post is with nine pictures that I had to upload? Last night it took me over an hour to write. Just as I was about to post it, IT DISAPPEARED during another Blogger burp.
I had to redo the WHOLE THING this morning.
The moral is: remember to save as a draft frequently or the same may happen to you!


Thanks for this tip! I would have never thought you could curl wrapping paper. I can ribbon curling ribbon like this when I helped my Mom wrap packages oh so many years ago! (No premade bows in those days)
ReplyDelete:)
Oh Zoey, what a brilliant idea! I'm forever throwing away all my strips of wrapping paper but now I'll be saving them for sure...I'm printing out your instructions so I won't forget!! Thanks so much for sharing this tip:-) xox
ReplyDeleteSuch a neat idea. I had no idea wrapping paper would curl either. I'll have to give this a try. A bad word escape from my lips.. Never.. :)
ReplyDeletePat
Ummm, Zoey, is there something you DON'T know how to do? Who needs Martha when we have you?? {grin}
ReplyDeleteThanks, Zooey - what a fun idea!
ReplyDeleteAnnie
Thanks so much for the extra work and the pictures! I just posted a question on a scrapping board of mine about this very technique. I've seen it done for a baby shower gift before, but didn't get the instructions on how to do it! She pointed me to your blog!
ReplyDeleteThanks for sharing! The pictures are very helpful!
Merry Christmas!
Excellent information and *timeless*, as it's so useful almost 20 years later! : ) Thank you! <3
ReplyDelete