Showing posts with label Christmas 2011. Show all posts

Sunday, December 25, 2011

The Shortbread Caramel Cookie Flop was Better as a Trifle

I made it today for our early in the afternoon Christmas dinner.  It is layered chocolate cake, chocolate pudding, whipped cream, Snickers candy bars, pulverized shortbread cookies,

melted caramel from the cookies, and Hershey chocolate syrup, with a sprinkling of toffee bits. I only used half a pan of the flopped caramel shortbread cookies.  I froze the rest for some other concoction.

We ate early today so my son could make the 4.5 hr. drive home without traveling too long in the dark. He should be calling any time now to let me know he got home safely.

I am happy to report that I am done cooking for the next 12 days...well, except for very easy things like leftover turkey, soup, etc.  I have already invited people to dinner on Saturday, Jan. 6. So until then I am taking it easy in the kitchen. I have cooked more in the past five days than I have in years.  It was fun, but I am glad to be done.

I did not take many pics on Christmas Eve. I did take this one of my Mom with one of her gifts.
Can you tell she has a sweet tooth?  LOL.  That's a restaurant gift certificate attached to the huge box.

One niece always brings me a hostess gift of wine.  This year she brought a chocolate/red wine combo.
Thanks, Christine. I must admit I have never tried this, but it looks interesting.  Chris says it reminds her of Bailey's Irish Creme. I like that so I expect to enjoy this just  as much as the varieties she has given me in past years.  It is fun to try the wines she gets from vineyards near Lansing, MI where she lives.

DH and I are about to feast on a big turkey/dressing/cranberry sauce sandwich..........We have been waiting a long time to have turkey leftovers!

Saturday, December 24, 2011

Salted Caramel Shortbread Cookie -- big FLOP!

I was so excited when I saw this recipe on Pinterest. I don't remember exactly who posted it, but it's easy to find if you just google.  Here are my caramel bites:
Don't they look delicious? They taste good, too. BUT about 10 minutes after I took this picture, they looked like this:
Yes, at room temp for just a short time, they MELT!  I made a double batch thinking they would be great for my Sweet Treats table.  That was before I went back to read the reviews and many people mentioned this same problem. I wish I had read the reviews before I made them. Needless to say I won't be using them on my table.  I will try to think of another way to use them so as not to waste. I am thinking along the lines of using them in a chocolate trifle dessert for Christmas day. I think I can warm the caramel and pulverize the shortbread and layer it with chocolate cake.  I will let you know how that works out.

I have been puttering all morning getting things ready for today's party. I have hidden all the treasure hunt items. This is one of them - a real chicken egg with a chicken inside. :)  It is in plain sight on the big tree, but it blends in with all the other bronze items on that tree, so it is not as easy to find as you might think.

Since the caramels flopped, I had to buy sweet items for the Sweet Treats table.

After putting out the candies, I lit the candles and tested my Christmas Golden Glow Slushtini...

not bad...I think it will work just fine.   As I was holding the 'tini with one hand and trying to take a picture, DH walked by. "That reminds me of a movie," he said.

"What movie?" asked I.

"One Flew Over the Cuckoos Nest," he replied.

"Ha, ha."

 My feet are beginning to burn from standing on them all morning, so I took this little blog post break. They feel better now. I have a little over an hour before people begin to arrive.  So I had better get the meatballs going.

I hope you, too, are having a good Christmas Eve.

Thursday, December 22, 2011

Rudolph's Nose Treats

I have been looking for round pretzels for the past three years to make these easy holiday treats. I finally found one bag last weekend.
In addition to the pretzels, you need Hershey Kisses and M&M's.  Unwrap the kisses (the toughest part of the entire process).

Use a silpat or aluminum foil to line a cookie sheet. Then put the pretzels on with a kiss in the center.
Put in a preheated 275 degree oven for about 2 minutes. Remove and immediatley put one M&M in the center,pressing to flatten the chocolate.  When you get the whole sheet done, put it in the refrigerator for about 20 minutes to harden the chocolate.

That's it!

 You now have Rudolph's Nose Treats (the red ones). Some people call them Santa's belly button. No matter what the name, they are tasty little sweet/salty treats for your Christmas gathering.  I still need to make a couple more sweet treats for my table.

This morning I made some shortbread/caramel bites.  I will show you those later.

I took today and tomorrow off  as vacation days to get organized for my C.Eve party.  Today I found all the treasure hunt items and made sure they were all listed on the check off sheet.  I hide these same items every year.

 All the guests have a list and they check off each item as they find it.

Last year my sister hosted the party and I took these items to her. She hid them and I got to play the game for the first time. I had so much fun trying to find them all. When they find them all, they get to pick a small gift. I wrapped 24 little gifts today

and my sister, Dee will bring at least that many more.   She is such a big help with the party, always willing to bring gifts, extra appetizers, etc. We play a number of different games and everyone goes home with at least one of these mini gifts--usually 4 or 5.   This year I made up a family trivia crossword puzzle. I think they will enjoy that one. 

I am expecting my son to arrive any moment. He has not been here for Christmas in a few years so everyone is looking forward to seeing him on Christmas Eve. 

I think I am pretty set now for the big night.  I am not one to wait until the last minute to get things done.  I already have all the ingredients set out for the appetizers I will make. Tomorrow I will wash the Martini glasses I got for Christmas last year (and never used yet). Two week ago I made my Christmas  Vodka/Peach Schnapps Slushtinis and those glasses will be perfect! The glass makes the drink--don't you think?  I would never think of serving my Slushtinis in a tumbler...a stemmed glass is a must! LOL. :)

I hope your plans are coming along nicely, too.

Monday, December 19, 2011

Paperwhites

Jim would like to thank all of you for your thoughts and prayers during this difficult time.

To die completely, a person must not only forget but be forgotten, and he who is not forgotten is not dead.Samuel Butler
Though he is gone from this earth, his father will live on in the hearts of many.


Last Saturday I changed the paperwhites container to a large round one with higher sides.  I also taped some white ribbon across the top to help the leaves from drooping when they finally get tall.


 Then I gathered some white lace and glued it around the top to cover the ribbon edges. I added a white flower swag on one side.
 one week later, the first paperwhite peeks through
I think the ribbon should hold them up. I just hope I will be able to tolerate the smell once they bloom!

Thursday, December 15, 2011

It is With a Heavy Heart that I Make this Post

on December 14th, my father-in-law  passed away.


About mid-morning today this rainbow appeared directly over the cross at this church next to my office at work. I don't think I have ever seen a rainbow in December. We like to think it is a sign that he made it to a better place.

His funeral will be Saturday morning.  May he rest in peace.


Tuesday, December 13, 2011

Green, Gold & Silver Grey Dining Room Christmas Table

 I set a fairly simple table with a very easy centerpiece of pinecones and green glass & silver mesh balls.  I nestled six votive candles among the greens.
 These amber glasses are circa 1974.
I like this table. I like the simplicity and how it blends so nicely with the bronze/green Christmas tree.

The second table is also set. I don't have enough of the same dishes, etc., so I did it differently, yet not glaringly so.  I still used pine cones in the centerpiece and green plates.

I reversed the glassware/napkins colors. The pink tablecloth goes with the pink hydrangea tree as this table sits right next to that tree.  It is a bit crowded with this table in the living room, but I guess being "cozy" is just part of the holiday season.

Sunday, December 11, 2011

Sweet Treats Table

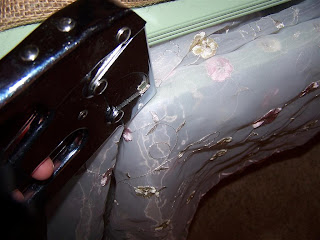
Now what in the world am I doing with a staple gun at 5:00 a.m. on a Sunday morning?
I have wanted to do a decorated dessert table for quite some time and I decided this would be the perfect opportunity.  I used a small desk I had and covered it in sheer frilly fabric and guess what else---burlap.  Yes, more burlap.  Actually I had used  all the burlap, so I took this piece out of the sled (you could barley see it in the sled anyway).  I stapled a sheer  fabric in layers across the desk drawer.

The piece of burlap I had was just long enough to go over the top and sides of the desk. Remember those letters I showed you last week? While this is what they were for (Sorry Chris J. they were not for a Christmas Eve game--Chris J is my niece and she has been reading the blog to see if she can get a heads up on some of the games we will play at party #2).
 I added a bow on each side with a Shiny Brite ornament in the middle. Underneath the table I put a can light.

I used every tiny  piece of burlap I could find It worked nicely to spiff up plain white candles with an added twine bow and a pink ball.

This table will hold whatever little sweet treats I decide to make.

The color is off in this picture as the light is not good at 5:00 a.m.

Here is a pic during the daylight which has correct coloring.


This table was such fun to do.  Now I need to decide what goodies to make to put on the table.

You may notice the dining room table to the right. I have it all set and will show that tomorrow.

Chris J. because you are such a loyal reader, I will give you  some inside info....brush up on family trivia as there might just be a little game requiring that knowledge. :)

Saturday, December 10, 2011

Christmas Chalkboard & Real Greens Arrangement

Last week I mentioned that I was making a Christmas chalkboard display with real greens.  Yesterday I went out and cut some greens from my shrubs and let them sit overnight to absorb water.  Every year I do at least one big arrangement of real greens just so I can get that wonderful Christmas aroma.

Today I made my display using floral foam soaked in water.  This arrangement should last at least three weeks as long as I add water as needed.

 I used a faux evergreen swag on the edge of the chalkboard. It's trimmed in the same ornaments I used on the tree. 

I added a strand of battery-operated lights to the swag, which I turned on for this pic:
The battery-operated lights don't seem to last long, so I will not turn them on again until party #1. The real evergreen arrangement is very simple--just greens, dried hydrangeas from my Limelight bush, sprigs of gold balls, and pine cones.

  I went for simple decorating this year and used a ton of pine cones.

I put a couple of wreaths around candles in the family room and used pine cones &  silver mesh balls to decorate the wreath.

The dining room centerpiece is a simple faux greenery/pine cone/silver ball arrangement. Normally I would have a 2ft tree on top of all my china/curio cabinets, but this year I cut way back on my decorating.  I usually have six 2ft trees atop various china cabinets. 
 Right now I am regretting not doing those trees. I really need a tree with white lights on top of that curio cabinet.  I would not be surprised if I change my mind and add more trees later this weekend.

I have been putzing all day with table centerpieces, the real greens arrangement, wreaths for end tables, etc. It's been a lot of fun today. There is no pressure as I still have a week before the first party and I have the meal planned, most of the decorating done, 2 tables ready to set, and  I have prepared my grocery list. DH bought some items while grocery shopping today and will get the rest next Thursday. He wants to do shrimp cocktails with fresh shrimp, so that needs to be purchased just before serving.

Oh, by the way,  I have changed my dinner menu.  After talking with DH, we have decided to do a plated dinner of stuffed chicken breasts for next Saturday's dinner. As long as I am doing 100% of the cooking, I may as well cook what I like, which is a plated meal. I was looking on my blog for past entrees that I liked and came across a post about chicken Florentine and potatoes Anna. I stated that it was too bad I had no guests as that dinner was definitely guest-worthy.  That got me to thinking maybe I should do it for my party.  I will also do Chicken Cordon Bleu since I don't know if everyone likes spinach.  Instead of salad, we will serve shrimp cocktails as the first course.  I happen to have the coolest shrimp cocktails dishes....there are two glass pieces and the crushed ice goes in the first bowl with the shrimp and cocktail in the bowl that sits atop the ice.  I have never used them for a dinner party...only for our own dinners for two.

DH will don an apron and be the server as I plate the dishes.  

So far I have had a very busy, but pleasant day.  I am now taking a break to blog. Blogging is what I do to relax.

I hope you are all having an equally wonderful Saturday!

Thursday, December 8, 2011

My Indoor Flowers are Starting to Grow/ Santa Ornament pattern

I think it's been a little over two weeks since I planted them.
 The amaryllis has greened up but the leaves have been the same size since week.  The paperwhites are just beginning to straighten up. 
I wanted to transfer them to a taller sided glass container, but I can't find the one I had in mind. I think I sent it off to the good will store a few months ago, thinking I would never use it again.  That always happens to me. . . whatever I get rid of I need shortly thereafter. I am going to rummage through the nearest flower vase store my basement to see if I can find something else. They will flop like crazy in this bowl.  Besides I may need that bowl for my dinner party.  I love clear pedestal bowls, don't you?  They look so elegant when filled with food.

Patti, from Osage Bluff,  recently sent me an email with this link from a site called Pinwheelponders. (pattern is the fifth row, last one).  And sure enough I liked it so much that I have already made it.  It's super cute and super duper easy. I think it took about 15 minutes to make.

Isn't he adorable?  A big thank you to Pinwheelponders for giving us this pattern and to Patti for passing along the link.

It also makes a very cute bag ornament for those who like to add a personal touch to their gift bags.

Monday, December 5, 2011

Grocery Bag Gift Wrap with Denim Bow

Who would guess that an old grocery bag and a few strips cut from a leg of jeans
would turn into this cute gift wrap?
I used the bag handle for the to/from tag. The center gold ball is one that broke off some sprigs I used elsewhere. 

The bow making method is the same as the one I showed a couple of days ago, except I did not use a round circle base. I wrapped a piece of denim around the package
and just hot glued the bow pieces to it.

I think it would be a cute wrap for a piece of jewelry for a teenager or for any small gift for a crafty friend.

No need to purchase expensive wrapping paper if you still have a grocery store that gives you brown bags.

Sunday, December 4, 2011

I Found the Most Delicious Soup

Last week I found this soup at B**ig L**ots. I bought one can to try it and it was delicious! 

Today I went back and bought four more cans.  It will make a wonderful light winter meal with a hot grilled cheese sandwich.

This is probably not the nicest comment, but whenever I see W**olfgang P**uck on TV, the first thing I notice is his ultra white false teeth.  Even on the can they are too white.  Why do people think their teeth need to be unnaturally white?

Today I did a bit more decorating....I was in the basement and came across a dark green bin that I had not looked in.

 Jackpot!

That bin had my gold metal bows and birds that I was missing on my tree.
Somehow I found space to add them to the tree. :)

I no longer buy storage bins unless they are clear. I need to be able to see what's in them.

I also worked on  Chrismasfying (yes, I made that word up) the chalkboard I made a few months ago.  from the ugly blue ocean oil painting. If you are wondering what I am talking about you can read that post by clicking here. I still need to make a fresh greenery arrangement to place underneath it. Once I get that done I will show it to you.

I also worked on a centerpiece for the dining room table. I can't show you that either as it is not quite done.

Friday morning we cleaned the carpets. Everything was nice, clean and neat until I brought up the bins, sacks, etc. to do more decorating.  Now it's a mess again.  I am never finished decorating for the holidays.  I keep adding more right up until Dec. 24th.  I think it's a sickness.


Friday, December 2, 2011

Wrapping Paper Bow How To

Have you ever needed a matching bow for your gift or just wanted to make your own wrapping paper bow?  I make them almost every year.  Tonight I wrapped my first gift and made my first bow.
I could have just used a purchased bow like this:
But I think my homemade wrapping paper bow is much more interesting and it is super easy to make from wrapping paper.  I had a small section of the base paper left that I cut off the sides of my gift package.

Then I cut a few strips of green foil paper. Don't worry about being exact. My strips were all different widths. You can adjust the size later. 


You need a circle to begin the bow.  I just ripped off the top of a cardboard ribbon holder, but you can draw and cut one out of a cardboard box to whatever size you need if your gift is bigger.

Cut the strips as long as you want them to be when folded over. Then take out your trusty glue gun and glue the bottom shut, then glue the piece on the circle as above.
Mine ended up like this.  Then I did a second slightly shorter layer of the base paper and stuck them between the open spaces. I did 4 layers total, alternating the paper color.

The fun part is finding something of interest to finish off the top. I used a walnut (painted silver)
Then I glued on a gold star to finish off the bow.

Turn it over and put a good amount of hot glue on the bottom circle and position it where you would like it on the package.


Ta da!


Now don't you think that is a more interesting package than the one with the little purchased bow?  It's also a great way to use up leftover wrapping paper.

I have blogged about a  few other bows I've made. If you want another idea or two look under my "Gift Wrapping" label.
Related Posts Plugin for WordPress, Blogger...