Monday, November 14, 2011

The Trees are Ready When I am--Which Won't be Today

Yesterday afternoon  as I was scrubbing floors (on hands/knees - I will spare you that picture) & cooking this pork roast with sauerkraut and carrots,

 DH brought up two Christmas trees. He put the big pre-lit  tree together (except for the top, which I asked him to leave off  and put in a plastic bucket so I could decorate it on the floor rather than on the ladder--at 7.5 feet tall the tree top is always very difficult for me - even on a ladder--the stand adds another foot or so).  I was too pooped to do anything with the trees on Sunday.
I am planning to do the main tree in bronze/gold/lime green. Saturday I bought these bronze icicles at our local dollar store. What a deal -- 3 bronze icicle ornies for 50 cents. 
I bought all they had, which was six packs. So I have 18 glittered bronze icicles for $3.00.


The window behind the tree is the family room window that I can't find the curtains for. Because I don't want to see the bare curtain brackets, I always leave the rod up and twist greenery around the it, then decorate it to match the tree.  Once I get the tree decorated, I will move it right smack in the center of that window--that is why it does not matter if I don't find the curtains until after Christmas.

I decided this year to do this little skinny 4ft. tree for the living room.  It's the perfect size for the edge of the dining room/living room. I am planning to decorate it with faux hydrangeas this year.  This tree is very old and the branches tend to fall out of those little holes that you stick them into. It used to be very frustrating to put it together every year & I detest putting strings of lights on a tree.  Now  I store this tree in the basement all assembled with the lights on and an old sheet tossed over to keep the dust off.   It is very lightweight, so it is easy to carry it up.  Once upstairs it's all ready to begin the fun decorating. 
The small tree sits inside a sled that I used to put outside on the deck. The sled is a great container for a small tree--it gives the tree more "presence", adding to the height and girth. It's related to the holiday and it 's also pretty darn cute once I put gifts, etc. inside it.  You can't see the runners in this pic, but I will take a better picture when it's completed.

So far I have not done a thing with either tree, but I like that they are upstairs and ready when I decide to start decorating. I will probably putter about with them after work each day this week.

I just looked at what people where googling when they landed on my blog and it's almost all Christmas related---pink tree, bronze tree, gingerbread man tree, sunflower tree, aqua tree.........etc. I have done so many different trees that they find my blog for almost any theme they search for.   So I don't think I am the only one with Christmas decorating on my mind.

I had such a busy weekend and Monday is always a busy day at work, so I have no energy left to cook. Luckily last month, when we went to one of those tribute concerts, we bought two meat-lover's pizzas (from a bar where we enjoyed a midnight snack) just to bring home and put in the freezer.  So tonight I will just pop one in the oven and reheat it.  Love that  small upright freezer we bought a few months ago!  We should have purchased a larger one as we have this one filled already.  DH had to rearrange things to fit a 14 lb. turkey that he got on Saturday.  I have always felt that the freezer is a working woman's best friend.

Sunday, November 13, 2011

Burlap Lamp Shade Remake - part 2

 (see yesterday's post for part 1)
I was happy to see that the shade dried completely overnight and looks good.
I am always amazed how Mod Podge dries and never looks blotchy. 

No, I am not leaving it like that.  The finishing details is where the fun begins.  I made a long piece of ruffled burlap (just like I made for the Ace shopping bag redo, but much longer).  Then I used hot glue to attach it across the bottom.
Of course, I won't leave that raw edge exposed.

Luckily I had just enough of the black wooden beads left from the animal handbag I made last month.
I just hot glued them on. I was very careful not to use too much hot glue because I didn't want a messy trim with hot glue gobs dried on the front side. I  bought those beads a few years ago with a lamp shade redo in mind. Yeah, it took awhile for me to get started. :)

I could not find anything new to use on the top edge, so I just reglued the original black trim back on.
I finished both lamps early this morning, but that was just the beginning. 

 I decided  the table needed to be covered in something complementary.  I spent until noon redoing things.

 When that was done, I felt I needed to add some burlap to the curtains. I ended up taking down the blue curtains and replacing them with an old set of tab-topped rusty maroon curtains. I cut them apart and added a 10-inch block of burlap near the top.

This is where I am at now. I have a major problem because I can't find the second set of rusty maroon curtains! I have searched two floors and they are nowhere to be found.  I am too pooped to do much more today. It's nearly 1:00 p.m. and I still have to get some major cleaning done.  

So one window will remain curtainless for a while. We always remove the curtains from that window anyway during the Christmas season as the tree goes in front of it.  Hopefully I will find the curtains before I take the tree down!

Saturday, November 12, 2011

Burlap Lampshade Project & Halloween Bargains

You may be wondering what happened with that Christmas tree I mentioned putting up today. Well, it's not happening today for sure.

Why?

Because at 6:00 a.m. I saw these Pottery Barn lamp shades...burlap shades...
$39 to $69 per shade....hmmmm...
I  happen to have a whole roll of burlap on the floor right beside my computer. I had the sudden impulse to recover two lampshades. 
So right then and there, I ran to the family room and took the shades off two lamps. I have been wanting to replace these black shades because you can't see anything with them. I have to take the shade off the lamp if I want to read.
So I pulled the black fabric off. It was very easy to do...just yanked it and it came right off.
I used the old shade for a pattern.


My first mission was to get the burlap on. I decided to use Mod Podge, but I could not find any. So I had to go shopping with DH at 8:30 a.m. We first stopped at our VFW chapter's Fall Craft/Treasures sale. We donated a bunch of items to this sale. Of course I found a few treasures to buy. After that I went to Joanne's for my glue while DH grocery-shopped. I found so many treasures there, that I almost forgot the glue I came for. Then we both went to Kmart and the dollar store....I found treasures at both. LOL. I don't shop often, but when I do, I stock up.  We finally made it back home about 11:30 a.m.

Right after lunch I went back to working on the shade. The black fabric is stretchy and I think that distorted the pattern, because I found it pretty difficult to get the burlap on nice and tight. I had a lot of extra burlap at the top and eventually ended up cutting it out, which meant a second seam. I don't how that will turn out. 

I used my thinly-gloved hand to rub the glue over and under the entire shade.
Yikes, it doesn't look too good here, does it?
Poor DH took one look and just shook his head and walked away.  I must admit that at the moment I am not feeling the burlap love....

I am not giving up yet. The Mod Podge is going to dry clear.  I still have a few finishing ideas, but I have to wait until it dries so I can see where I am at.  I probably won't be able to do anything until tomorrow morning.  So you will have to stayed tuned to see if the project is a success of if it will be put to the curb for Thursday's garbage pick up.

In the meantime, look what I bought at Kmart:

Halloween decorations!  I could not resist. The black/green pumpkin was regularly $8.99. Just what I paid?  89 cents!!  Everything was 90% off.  I payed less than $3 for all of this.  Now, that's my kind of bargain shopping.  One bag is full of bloodshot eyes.  How cool would they be dropped into a Halloween cocktail glass?  I really must have a Halloween dinner party next year so I can use this stuff.

Friday, November 11, 2011

Veterans Day 11-11-11

I took a lunch hour today and went to the Veterans Day ceremony in our city. ( I just learned today that the official spelling is Veterans - no apostrophe.) It's very hard for me not to add that possessive apostrophe!

I was amazed at the number of people there. I expected perhaps a dozen or two, but there were many more people than that.

Cars were parked up and down both sides of two long driveways that lead to the field of white crosses.

On this very cold fall day  we all paid tribute to our fallen heroes with prayers, speeches, songs and salutes, including this nine second video of  the three volleys of rifle shots fired in honor of the deceased veterans .

(just click the first arrow to hear the guns)


As they do most years, my mom and dad carried the wreath for the Korean soldiers.
It was a nice service and I am glad I went.

Last week I bought a new necklace on a  black rope.  I loved the bronze/black color.
It goes with quite a few of my fall/winter jackets. Today I wore it with this one:

I am planning to stay home this weekend and get some much needed cleaning done. I may even bring up a Christmas tree and began to play around with this year's color scheme of gold/bronze/green.  I know it's too early, but  after this weekend, my weekends are all tied up until mid December.  So it's now or 4 weeks from now.  My feeling is if you don't do it until two weeks before, why bother?  LOL.  It's too much work for just two weeks. I promise I won't light it up until after Thanksgiving.

Monday, November 7, 2011

Ace is the Place


to get one of these shopping bags.

You  may be asking yourself why anybody would want one of these.

Yes, it's just a cheap reusable shopping bag that nearly every store sells for a buck or two.


Here is more information than anyone (but me) wants to know about this bag:

  • 100% recyclable polypropylene
  • 12.5"W x 14"H x 8"D
  • Handle: 19"L x 1/8"W
  • 24 lb. capacity  
  • Each bag is designed to replace 2 paper bags or up to 4 plastic bags
  • Used weekly for 2 years replaces 416 plastic bags 
I find it has some admirable qualities, though it's pretty plain--certainly not fashionable. I also hate to carry a bag with a logo.  They are not paying me to advertise for them, so why would I tote around their logo?

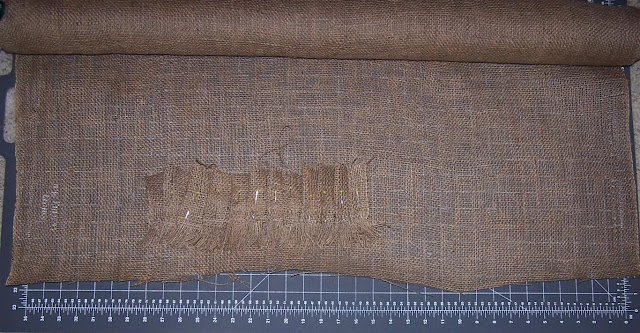
Right after putting the Ace bag aside, I wandered out to my garden shed and saw this roll of burlap.

I wonder when and why I bought this? It must have been during a streak of ambitious shopping. Truth be told,  I am way too lazy to cover shrubs with burlap.  So the burlap sat for multiple years in the corner of the shed.

 Hmmmmmm.....maybe I could do something with the burlap to transform the useful, but bland shopping bag...my mind soared into overdrive as I happily toted the coarsely-woven fabric into my sewing room.


I immediately took a measurement and began the restructuring of the Ace bag.

When I get done with this bag, nobody will know that it began its life in this somewhat dull/boring form.

Well, that is nobody but all of you, because I am about to  blab all the details right now.
The burlap just happened to be the perfect width after finger pleating to fit across the bag front. I cut an approximately 4-inch strip, raveled the bottom, sewed a zigzag stitch at the top of the ravels to prevent more ravelling, then  pleated it to this size.
I just eyeballed the pleat size. It does not matter one iota if one pleat is wider than the next.

I wanted to use two fabrics, so I picked out a complementary fabric to alternate with the burlap. I chose a fabric with a black background  so it would blend in with the handles and side of the bag, which won't be covered in new fabric.
Layer #1 is on.  Notice I put a hem in this fabric instead of fraying it.  All I am going to do is alternate this with the burlap and sew five strips on top of each other across the front & back...simple, simple, simple!

It was quite easy to turn the Ace bag into this handy little carrier:


It can be used for lightweight food shopping, with an heavy stress on the "lightweight".  I think the
 24-lb. capacity stated above is on the optimistic side.
Oh, but does it not look prettier than one of those awful plastic grocery bags? 

It almost makes me want to take over the grocery shopping just so I can use this bag. 

Whoa--Zo--Get a handle on it--just listen to yourself--are you ill?

Whew--I was a bit lightheaded for a moment! Now that I have come to my senses,  I think I will just use it for my library books.

I would normally post this on my sewing/quilting blog, but since my garden is done, I have little to post here, so I decided to post it on both.  My apologizes if you follow both of them.

Friday, November 4, 2011

Burning Bushes and Other Late Fall Color

I just came in from a little walk through the back gardens. 

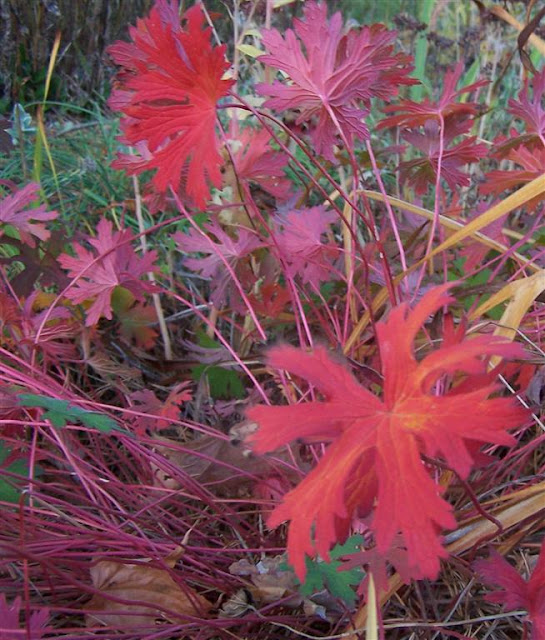
Who knew that this Johnson's Blue geranium's foliage turned bright red in late autumn?


I must have cut it down early in previous years because I don't remember this lovely fall color. Sometimes it pays to procrastinate on your garden chores! :)

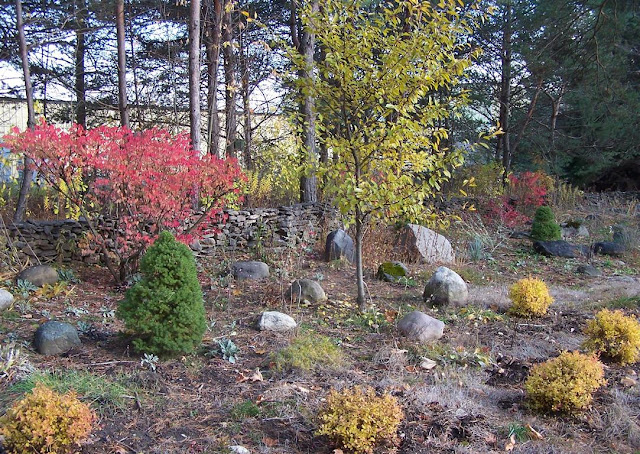
When we had the porch put on this summer, we had to move a huge Burning Bush. We decided to plant it in the rockwall garden.  I was not sure if it would survive.
 It did and it is now bright red.  Below you can see it through the arbor:
 When I stand in my kitchen and look out, I see this:
From the Kitchen angle the cherry tree blocks the bush! Darn. I will have to decide whether to move it again next spring.

On my walk around the garden, I was happy to spot these three pastel-colored Oriental  poppies. This will be their third year and they look a lot bigger than they were last year.


I will be looking forward to a lot of blooms this spring!

On the deck the only planter still going is this little perennial herb pot:
 I might get to use some of that fresh sage in my dressing this Thanksgiving!

I hope you all have a wonderful weekend. Hopefully all of you out East won't get any snow.

Tuesday, November 1, 2011

How Many Times a Day can HGTV Air the Same Program?

I used to love to watch HGTV.  Now every time I turn it on, I see House Hunters.  WHO CARES ABOUT OTHER PEOPLE BUYING HOMES?????  I can barely stand it!  I ask myself how many times a day can this show possibly be on?  I wondered if it just seemed like I was finding this show every time I turn on that channel.   So I decided to check it out.  I get home from work around 3:30 p.m. By the time I am ready to turn on the TV, it's about 4 p.m.
OMG-- starting at 4pm, it's on 7 times in one 24-hr period! I am not going nuts. .. . it really is on every time I switch to that channel.  Why? Why? Why? Do people really care about this show?  


Rather than watch HGTV's boring repeats, I suggest you all try to find a R*od S*tewart tribute concert. I went to one last Saturday and it was great. This guy looked and sounded just like the real thing. Just to prove it to you,  I found a few videos on Youtube.
He even came right up to my chair, knelt down, looked directly in my eyes and sang.  I got a hug before he went back on stage. I wonder if it was the animal outfit I wore? LOL.  Wouldn't you know I did not bring my camera this time so I could not document the big moment. 

Last night we did not get one trick-or-treater.  I guess all the neighbor's grandkids  went to larger subdivisions.   We have no young kids on our dead-end road.  Now I have to eat all those peanut butter cups. Darn!

Monday, October 31, 2011

Happy Halloween

No time for a long post as I have to get over to Pea's for the Halloween party tonight.

Don't you love my costume?
I just wish I had worn my purple glasses with the black and green sides! :)

Hope you are all having fun with the trick-or-treaters.

Saturday, October 29, 2011

If you can't Decorate with it, Wear it.

Grey or Gray?

I have been having quite the dilemma over the spelling of this color.  I have always thought it to be "grey".  But most often when I see it on other blogs, they spell it "gray".   I tried to spell it with the "a",  but it just does not feel right.  So I am now going back to "grey". 

So................some of you may remember this orange/grey color scheme I showed awhile back.

I was considering it for DH's tiny office space.  So far we have not painted that room. We are so overwhelmed with changing everything , that we have just left it as is. I am getting more and more like that. Everything seems to be such a big hassle, that I do nothing instead. It's so much easier that way.

I still love this color scheme...........so much so, that  I recently wore it!


Grey and orange--it's a great combo -- whether on the walls or on the bod--I love it!

I  need to finish this turkey project that I started in February.

I made two of these and intended for them to be table drapes for  a buffet or dessert table for Thanksgiving.  Now I don't think I will be cooking for Thanksgiving, but I may finish them off just in case. There is always next year and it would be nice to be ready if I do need them. 

Thursday, October 27, 2011

Apple Oatmeal Cookies w/Browned Butter Glaze

Last weekend I also baked some cookies. I was not kidding, when I said I spent most of the weekend cooking/baking!

I made an oatmeal/apple cookie that I have not made in a long time.  With the oatmeal and fresh apple, this cookie is so full of fiber that it almost seems healthy.

On the recipe I noted that DH likes these.  He can be a little picky regarding cookies, so I always note if the recipe appealed to him.

He has quite a sweet tooth and I know he loves frosting, so I added some browned butter glaze to the recipe. He must have loved them because I made a double batch and when I went to get one four days later, they were gone! A quick mental calculation  says he ate a dozen a day!
 Apple Oatmeal Cookies
Ingredients:
1 cup all-purpose flour
1 teaspoon baking powder
1 teaspoon ground cinnamon
1/2 teaspoon salt
1/2 teaspoon ground nutmeg
1/2 cup shortening
3/4 cup white sugar
2 eggs
1 cup rolled oats
1 cup diced apple without peel
1 cup chopped walnuts
Directions:
1. Preheat oven to 350 degrees.
2. Combine the flour, baking powder, cinnamon, salt & nutmeg; set aside. Using a mixer, mix the shortening and sugar until well combined. Add the eggs, one at a time. Slowly pour the dry mixture into the wet mixture until combined. Fold in the oats, apples and walnuts. Use a 1/8 cup measuring cup and drop dough about 3 inches apart onto parchment- lined cookie sheets. If you don’t have parchment paper, just grease the cookie sheets.
3. Bake until lightly browned (15 –20 minutes, depending on the size of your cookie). Let cool on wire racks. Makes about 2 dozen cookies.


For the glaze:

Brown 1/2 cup of butter over a medium heat.  Keep stirring the butter until it is a light golden color:


Add 1.25 cups powdered sugar. If too thick, add enough water  to make a glaze. Then spoon the glaze over a warm cookie so it spreads and turns transparent.
If you make these, I hope you enjoy them as much as DH did.

Tuesday, October 25, 2011

Mixed Animal Print Outfit & Banana Coconut Cupcakes w/Cooked Caramel Frosting Recipe

Today I am wearing this outfit while toting the  mixed animal print handbag I made Saturday.
I just wish I had some animal print sides for my glasses! I plan to get a set, but they were out of them the last time I was there. 

Since it's only 36 degrees outside, I will have to wear my animal jacket, too. :)

Every now and then you need to dress for fun!


DH knows that I use spotted bananas for baking, so when he came across this bunch at the grocery store, he could not resist bringing them home to me.
Instead of throwing them in the freezer, I decided to make some banana cupcakes and freeze half of those.


I used this recipe (I added toasted coconut to 1/2 of the batter) for the cupcakes. I like that the recipe uses 4 bananas (most use 2) so there is a lot of banana flavor.

A-Number-1 Banana Cake
Rated: 5 stars
Submitted By: Kevin Ryan
Photo By: Angie
Prep Time: 30 Minutes
Cook Time: 30 Minutes Ready In: 1 Hour

"This is a very versatile and fast cake recipe. Not only is it moist and delicious, the same batter can be used to make banana bread and muffins. Delicious frosted with chocolate or cream cheese frosting."

INGREDIENTS:

2 1/2 cups all-purpose flour
1 tablespoon baking soda
1 pinch salt
1/2 cup unsalted butter
1 cup white sugar 3/4 cup light brown sugar
2 eggs
4 ripe bananas, mashed
2/3 cup buttermilk
1/2 cup chopped walnuts

DIRECTIONS:

1. Preheat oven to 350 degrees F (175 degrees C). Grease and flour 2 - 8 inch round pans. In a small bowl, whisk together flour, baking soda and salt; set aside.

2. In a large bowl, cream butter, white sugar and brown sugar until light and fluffy. Beat in eggs, one at a time. Mix in the bananas. Add flour mixture alternately with the buttermilk to the creamed mixture. Stir in chopped walnuts. Pour batter into the prepared pans.

3. Bake in the preheated oven for 30 minutes. Remove from oven, and place on a damp tea towel to cool.


Cooked Caramel Frosting

1/2 cup of butter
2 cups brown sugar (I used light brown)
1 cup heavy cream
1/2 tsp. baking soda

Combine the cream and brown sugar in a heavy pan with high sides. Bring to boil. Stir continulusly for one minute. Add the 1/2 tsp. baking soda and boil one minute more.  (This is why you need a high sided pot; it will foam up). Remove from high. Cut the butter into pices and drop on top of the mixture. DON'T STIR it in.  Put the pan in the refrigerator until it's cold (I left mine in for about three hours)
It will look like this when you take it out:

I transferred mine to my big mixer.
See all that sticky caramel?

Get it all out.
Then beat on high until it looks like this:

I think it took about 5 minutes. I also added a touch more cream as mine seemed a bit thick.
The plain caramel frosted ones have no coconut inside.
Related Posts Plugin for WordPress, Blogger...